Cutting skills take time for children to develop. Being able to use scissors to cut well is important for many preschool and school activities including art and craft. Children may have the skills to use small scissors by three to four years of age, but scissor skills are not fully developed until 6 years of age.
When is my child ready to use Scissors?
To use scissors, children need:
- Good sitting balance so they can use their arms and hands freely.
- Strong wrist and hand muscles to open and close the scissors.
- Development of a preferred and an assistant hand. Cutting involves each hand doing different tasks that require practice. The preferred hand uses the scissors, and the other hand turns the paper.
- Good coordination of their eyes and hands for cutting around shapes.
- An ability to use the thumb, index and middle fingers whilst the other fingers remain fairly still.
- A pair of suitable scissors and an interest in using them.
Scissor skills Development by Age
At what age does a child learn to use scissors? Below, we list cutting skills by age. Generally, development of scissor skills for toddlers and young children are as follows:
2 – 2.5 Years Old:
- Shows interest in scissors, may hold scissors and manipulate scissors.
- May not hold scissors correctly but might begin to open and close scissors.
2.5 – 3 Years Old:
- Will begin to make single snips on paper in an uncontrolled fashion.
3 Years Old:
- Begins to cut in a forward motion across a 6-inch line with more control.
- May begin to use their other hand to stabilise paper while their dominant hand is cutting.
3.5 – 4.5 Years Old:
- Can cut down a 6-inch line making slight errors.
- May begin to cut out curves and circles.
4.5 – 5 Years Old:
- Can cut out a square and other simple shapes/figures.
6 Years Old:
- Cuts complex shapes that include both curved and straight lines.
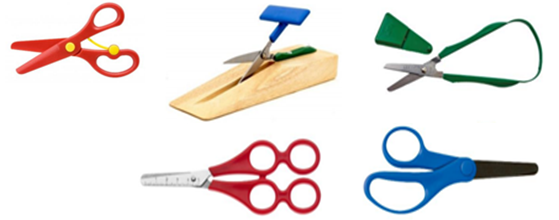
Choosing Scissors for your Child
Scissors with tiny oval handles are easiest for children to use. Short blades will give the cutter the most success. The scissors also need to be sharp enough to cut the material on hand or it will be a frustrating experience. Children will need supervision for sharp scissors. Make sure that scissors have rounded rather than pointy ends for safety.
Scissors for Left Handers
- Always provide left handed scissors for left handed children.
- Right handed scissors are designed so that the natural bending of the fingers and thumb pull the blades together. In the left hand the same movement causes the blades to move apart so the paper bends or the cut is not as clean. The wrong scissors also make it difficult to see the line that is being but because it is blocked from view. Scissors that can be used with either hand also block seeing the line and have a tendency for the blades to loosen.

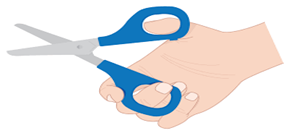
How to Hold Scissors
Everyone has their own style of holding scissors. However, if you get a chance to teach your child then this is a good way of holding them:
- Putting the index finger in front helps to give good scissor control. This grip also strengthens the same muscles that children need for drawing and writing.
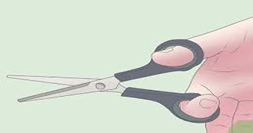
Activity Ideas for the Correct Grasp
- When holding a pair of scissors for the first time reinforce your child’s hand position by getting them to do the ‘thumbs up’ sign. Remind your child each time the correct way to hold the scissors, reinforce the ‘thumbs up’ and give them plenty opportunities to practice.
- Get your child to hold a beanbag between their elbow and side whilst they practice cutting to ensure that their hand and arm position remain correct whilst cutting.
- Try marking the thumb hole with a piece of coloured tape so your child knows where to place their thumb.
Scissor Activity Ideas
- Ask your child to snip a playdough sausage into pieces with their scissors.
- Try getting your child to cut a plastic drinking straw into pieces to make ‘beads’. They can then lace them together to practice their threading skills.
- Get your child to snip along a piece of thick card (as this is more rigid for a child to hold). Then get them to try snipping different textures before moving onto paper.
Extra Tips
- If you don’t want your child to use sharp scissors, they could practice cutting playdough sausages with plastic scissors.
- Start with a collection of old flyers, catalogues and magazines for when your child gets really involved in cutting.
- Encourage them to paste their pictures onto larger sheets of paper.
- Develop a system for cleaning up i.e., rules about what and where they can cut and who is going to pick up the scraps.
- Keep your good sewing scissors out of reach!
Scissor Skills Process
- Show how to hold scissors and practice cutting in the air.
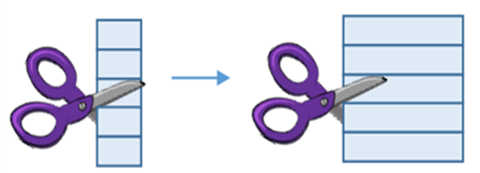
- Once the child can open and close the scissors efficiently, encourage snipping across strips of card approx. 1cm wide. As accuracy improves, move onto larger width strips of card until they are able to combine opening and closing scissors with moving them forward.
- Practice above using several types of materials e.g., newspaper, foil, thin card, old postcards, playdough, plasticine or blue tac and encourage random snips.
- Encourage child to cut across (not necessarily in a straight line).
- Once the child is able to snip and cut card, move onto paper. Stick lolly sticks or straws on paper in straight lines and encourage child to cut between sticks.
- Start with thick solid lines to cut. As accuracy and success is achieved, reduce thickness of lines to a single felt tip line.
- Start cutting along straight lines and then progress to curvy lines, zig zags, square, triangle and circle etc.
Straight Lines
- Repeat above with wool and sandpaper etc.
- Colour ½” – 1” strips across the paper and cut on coloured strip.
- Stick several strips of varying thickness of paper and card on a sheet of paper and ask child to cut along edge of strip – using edge as guideline.
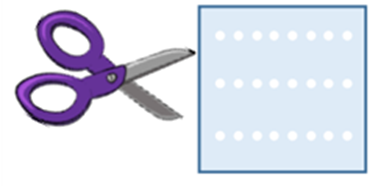
- Punch a series of holes in paper or use punched edge of computer paper and ask child to cut through holes.
- Cut strips of paper and glue into circles to make paper chains.
- Glue small pieces of material or stickers in a piece of paper and ask child to cut from one to another. Gradually put more pieces on the paper to make it more difficult.
Curves
- Repeat above section using curved lines
- Stick card circles (face) on piece of paper and ask child to cut out using card as guideline
- Stick on coloured circles shapes on paper and ask child to cut out.
Ideas to Make
- Snake mobile: Draw a colour spiral, cut from outside to centre, attach string at the centre point and hang.
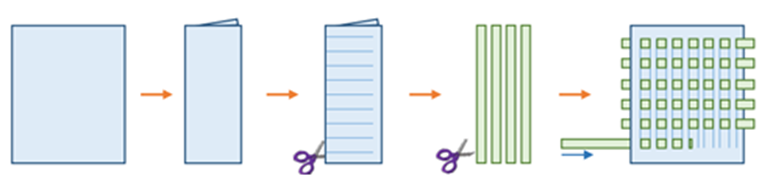
- Weave Away and Make a Mat:
Using 2 pieces of paper; fold one piece in half and draw lines from the crease to just before the edge of the paper (see below). Cut along each line and open up the folded paper.
Cut the second piece of paper into strips. Then weave the strips into first sheet. Sellotape ends to fast mat.
- Make a House by using large squares, triangle – house and roof.
Large Square – House
Triangle – Roof
Small Squares – Windows
Rectangle – Door
Circles – Flowers